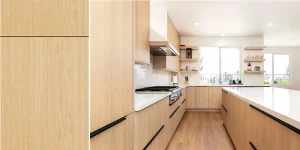
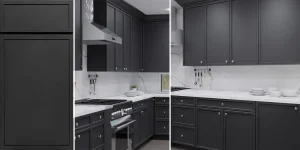
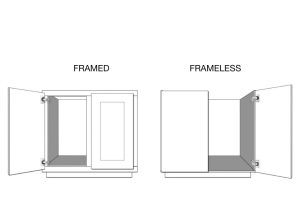
Frameless kitchen cabinets, often called European-style cabinets, are known for their sleek design, full-overlay doors, and tight reveals. However, their precise fit means even the smallest misalignments can stand out. Installing these cabinets requires careful planning, accurate measurements, and meticulous attention to detail. Below is a comprehensive guide for installing frameless kitchen cabinets, incorporating insights from experienced carpenter Aaron Butt.
Key Considerations Before Installation
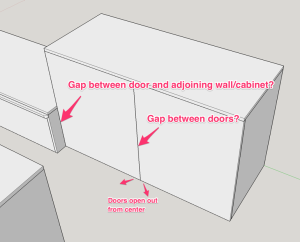
Precision is Paramount: The tight reveals and full-overlay doors leave little room for error. Any misalignment, even as small as 1/4 inch, can disrupt the overall look and functionality.
Field Verification: Always compare actual kitchen dimensions to cabinet shop drawings. Check for out-of-plumb and out-of-level walls or floors to plan necessary adjustments.
Tools and Materials: Laser level, chalk line, tape measure, shims, clamps, cabinet screws, drill, and a sturdy ledger board are essential.
Step-by-Step Installation Process
1. Layout and Preparation
Mark Control Lines: Project a laser level line onto the walls to serve as a reference point. Measure down to the floor in multiple locations to identify the highest spot.
Determine Cabinet Height: From the highest spot, measure up 34-3/4 inches (the standard height for base cabinets minus a 1-1/4-inch countertop) and snap a chalk line across all walls that will receive cabinets.
Plan Box Placement: Write the dimensions of individual cabinet boxes on the walls to verify design alignment with field conditions.
2. Install Upper Cabinets First
Start in the Center: Begin with the center cabinet, typically above a sink or a focal point, for balanced installation.
Use a Ledger Board: Attach a 2x board along the chalk line to temporarily support the cabinets and ensure they remain level during installation.
Fasten Cabinets Securely: Drill pilot holes in the cabinet backs at stud locations. Screw the cabinet into the wall, ensuring it is plumb and level.
Join Cabinets: Clamp adjacent cabinets together and secure them with screws for a seamless appearance. Check alignment frequently.
3. Install Base Cabinets
Locate and Level the First Cabinet: Start with a corner base cabinet. Shim as needed to ensure it is perfectly level.
Connect and Secure Cabinets: Align adjacent cabinets, clamp them together, and screw them into place. Check for level and plumb after securing each box.
Adjust for Appliances and Ducts: Use fillers or custom cuts to accommodate obstructions like vents or uneven walls.
4. Kitchen Island Installation
Mark the Layout: Use chalk lines to outline the island placement on the floor.
Secure Base Cabinets: Anchor the island to the floor or subfloor using brackets or blocking to prevent movement.
Assemble the Island: Join cabinets, ensuring the assembly is level and square.
Challenges and Solutions
Out-of-Square Corners: Use shims to align cabinets and compensate for irregular walls.
Oversize Cabinets: Install large end panels or custom cabinets last to ensure proper fit with existing structures.
Alignment Issues: Continuously verify plumb, level, and square as you proceed. The uniform appearance of frameless cabinets makes misalignments highly noticeable.
Final Steps
Attach doors, drawers, and hardware, adjusting hinges to ensure proper alignment.
Install end panels and filler strips to close any gaps between cabinets and walls.
Apply caulk or trim as needed for a finished look.
Tips from a Pro
Frameless cabinets offer more interior space and easier access than face-frame cabinets but demand greater precision during installation.
A ledger board can simplify the process of leveling and supporting upper cabinets during installation.
Avoid rushing meticulous planning and step-by-step installation will save time on corrections.
Installing frameless kitchen cabinets combines craftsmanship, problem-solving, and precision. While it’s a more complex process than installing framed cabinets, the clean and modern look of frameless cabinets makes the effort worthwhile.